the story of our refinished pine floors
One of the things I loved about Apricity house was the original wood flooring. Unfortunately, the previous owners did not take great care of them. In places the finish was completely warn off, there were some boards that with holes in them, and age had turned the finish too orange for my liking. We knew we needed to refinish the floors and this summer we took the first step and refinished the downstairs.
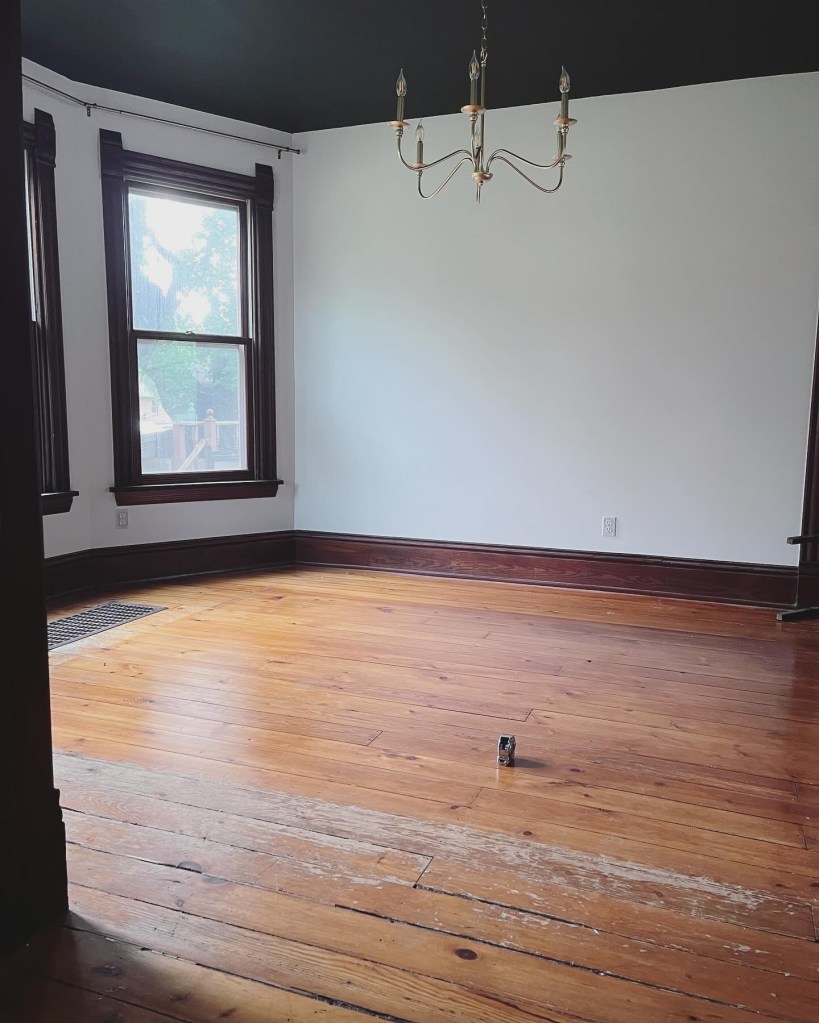
Before:
Worn and orange floors
This project was one where we called in the help of a friend who had re-done some floors in the past. I cannot say enough about how thankful I am for his help on this project. Without him, we would not have gotten this done.
Our planning phase held a lot of decision making. We wanted to maintain the character of the wood, we wanted to limit the number of boards we had to replace, and we wanted to fix some of the areas that were in a bit of disrepair. One of my biggest concerns were the large gaps between some of the boards.
A lot of research went into how we wanted to deal with cracks and areas where we needed a filler to avoid replacing the board. Traditionally, rope has been used or sawdust from the refinishing process. Other wood fillers have been used but can frequently crack if there is a lot of fluctuation in the boards. Given this, we started looking for a permanently flexible filler. And we found one: PAK Stop/PafukiPowder by Berger-Seidle. This filler is troweled and then sanded down afterwards and for us was the perfect way to keep the original boards and have a beautiful solid surface to walk on when done.
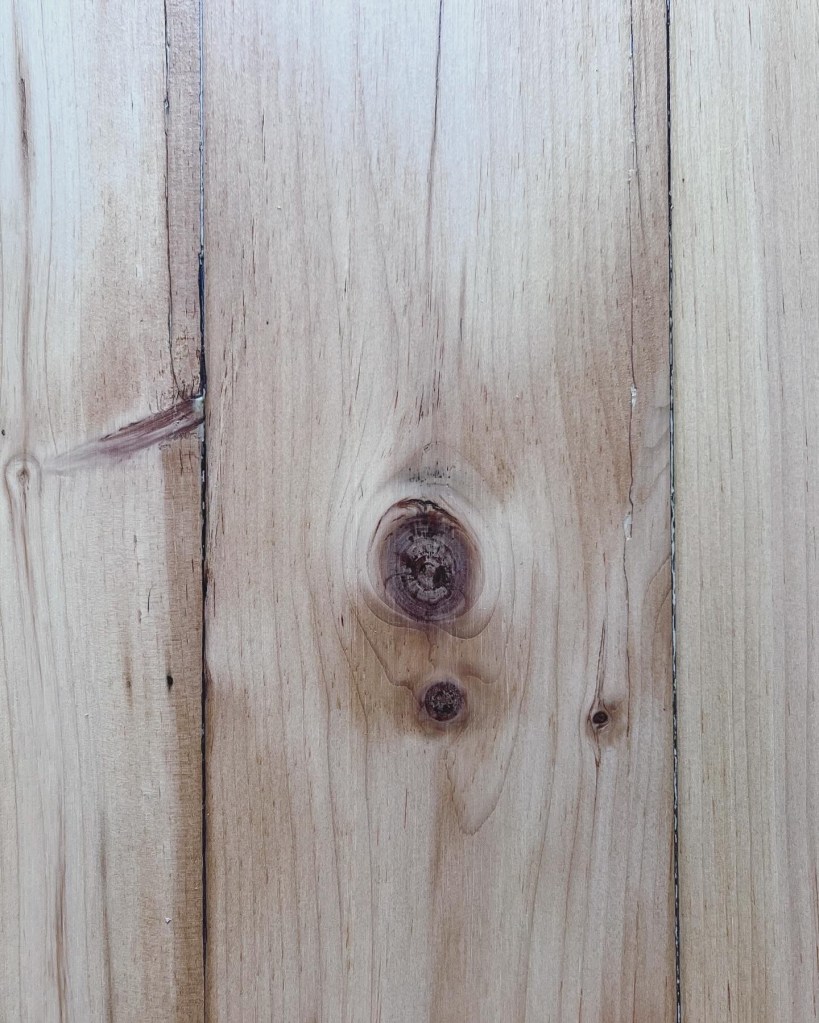
After: the details
To lighten the floor color we went with an essentially a clear stain and finish. Old pine boards retain some of the color from past stain, so the color isn’t glaringly white like a new pine board. We utilized Bona water based products and to add a modern touch used a matte finish. One of the things I love about this approach is that because you aren’t adding color, you get to see the character of the boards. The downside is that you can’t mask well areas where wood has to be replaced. While one option would be to find reclaimed wood if possible, we were not able to do this and so for the areas of floor we replaced we gently stained them individually to add a bit of color to blend in with the rest of the floor.
After all the hard decisions were made, it was execution time! We replaced necessary boards, took out old, cracked filler, sanded the boards down, added the flexible filler, sanded again, cleaned thoroughly with mineral spirits then applied the seal and topcoat.
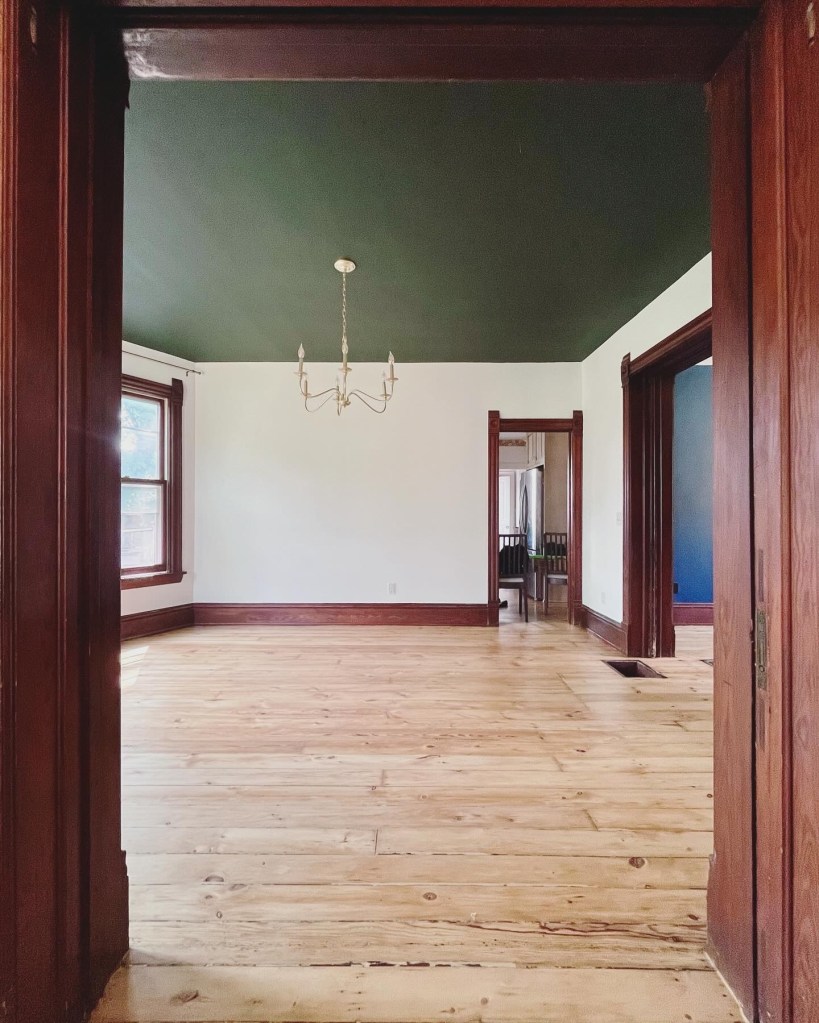
After: the new look
The transformation of these floors is incredible. The boards aren’t perfect, but I love that. They are chock full of stories and memories written by so many feet treading over them – they were worth saving. Now we get to add to their story, our own feet and furniture resting and walking and enjoying life on these beautiful boards.

One response to “Old Boards, New Look”
Wow it looks SO great! We have needed to redo our floors since we moved in 11 years ago, but haven’t due to kids & pets. This post makes me want to finally make it a priority! Have a good day!